

把 JumpServer 对接 AD 跑通之后,继续把 Mailu 接进同一套 AD 环境。目标很明确:
Mailu 保持自己的邮件服务能力
AD 作为统一的用户来源
从指定 OU 自动读取启用用户
自动在 Mailu 中创建对应邮箱
由于Mailu 不太像 JumpServer 那样,直接填 LDAP/AD 参数就完成原生域认证,所以最终的方案不是Mailu 直接用 AD 密码认证登录,而是AD 管人,Mailu 自动建邮箱。
这套方式依赖两部分能力:
- AD 的 LDAPS 查询能力
- Mailu 的 REST API 创建用户能力。
- Mailu 的 /api/v1/user、/api/v1/user/{email} 等接口可用于查询和创建邮箱用户。
本文环境如下:
AD 域:ad.yxwa.info
域控:DC01.ad.yxwa.info
Mailu 域:yxwa.info
同步范围:OU=class,DC=ad,DC=yxwa,DC=info
邮箱命名规则:sAMAccountName@yxwa.info
例如:
AD 用户 test1 → Mailu 邮箱 test1@yxwa.info
AD 用户 test2 → Mailu 邮箱 test2@yxwa.info
前提条件有两个已经确认:
AD 通过 LDAPS 正常工作,域控证书有效。
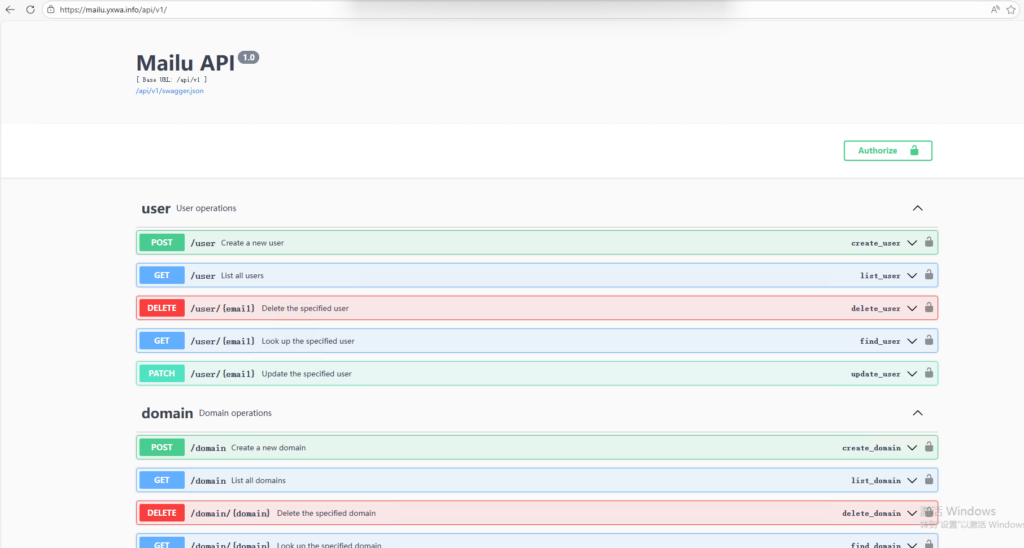
Mailu 已启用 API,且 API=true、WEB_API=/api,Swagger 可从 /api/v1/swagger.json 读取。
先让 Mailu 服务器信任 AD 的 LDAPS 证书
因为 AD 用的是内部 CA 证书,Mailu 服务器默认不信任,需要先把 CA 链加进去。
先合并 CA 链
cat /tmp/intermediate_ca.crt /tmp/root_ca.crt > /tmp/ad_ca_chain.pem
安装到系统信任
mkdir -p /usr/local/share/ca-certificates/ad
cp /tmp/ad_ca_chain.pem /usr/local/share/ca-certificates/ad/ad_ca_chain.crt
update-ca-certificates
验证 LDAPS 连通性
openssl s_client -connect DC01.ad.yxwa.info:636 -servername DC01.ad.yxwa.info
如果能连通,再继续验证 LDAP 查询。
验
ldapsearch -x -H ldaps://DC01.ad.yxwa.info:636 \
  -D "administrator@ad.yxwa.info" \
  -W \
  -b "OU=class,DC=ad,DC=yxwa,DC=info" \
  "(&(objectClass=user)(objectCategory=person))" sAMAccountName userPrincipalName
如果返回类似下面的内容,说明 AD 查询正常:
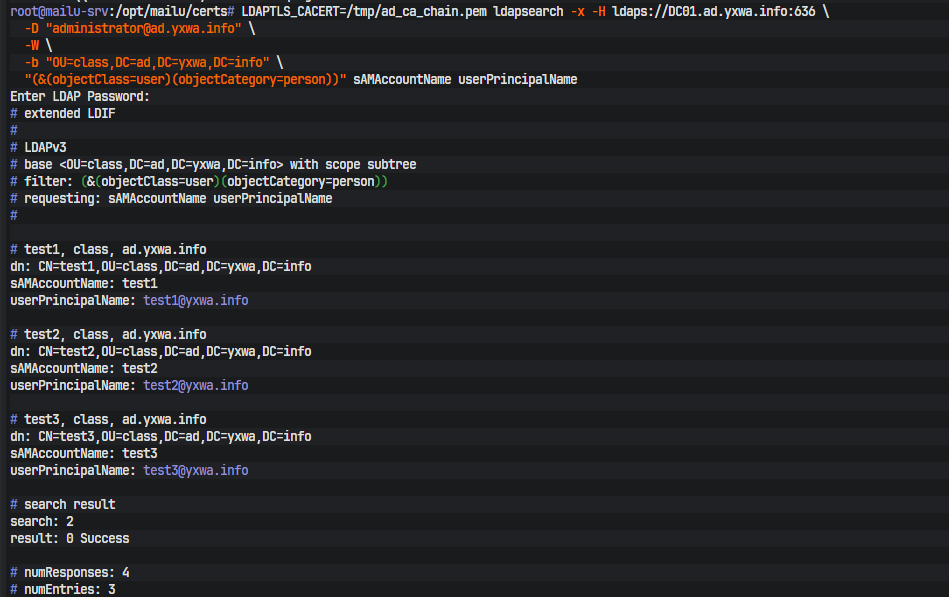
我们最终就是基于 sAMAccounte来生成 Mailu 邮箱名。
验证 Mailu API
Mailu 已经提供了标准 API,Swagger 中可以看到:
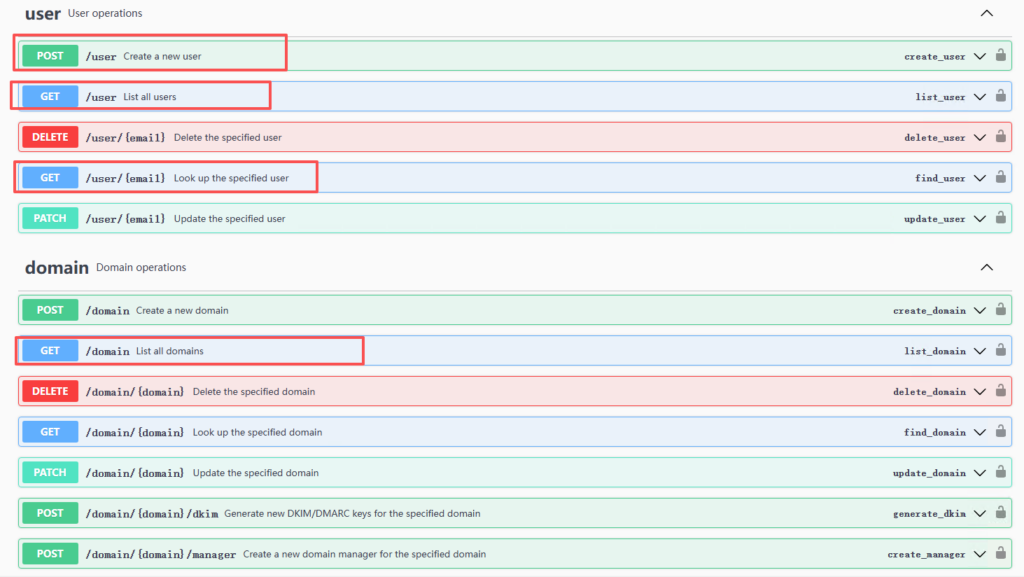
GET /domain,GET /user,GET /user/{email},POST /user
这些接口都在 /api/v1 下。
查看 API Token
curl -s -X POST \
  -H "Authorization: Bearer <MAILU_API_TOKEN>" \
  -H "Content-Type: application/json" \
  -d '{
    "email": "test2@yxwa.info",
    "raw_password": "<INITIAL_PASSWORD>",
    "enabled": true,
    "enable_imap": true,
    "enable_pop": true,
    "quota_bytes": 2000000000
  }' \
  https://mailu.yxwa.info/api/v1/user
Mailu 的 POST /user 接口要求至少提供 email 和 raw_password。
查看域名列表
curl -s \
  -H "Authorization: Bearer <MAILU_API_TOKEN>" \
  https://mailu.yxwa.info/api/v1/domain
查看用户列表
curl -s \
  -H "Authorization: Bearer <MAILU_API_TOKEN>" \
  https://mailu.yxwa.info/api/v1/user
手工创建一个用户测试
curl -s -X POST \
  -H "Authorization: Bearer <MAILU_API_TOKEN>" \
  -H "Content-Type: application/json" \
  -d '{
    "email": "test2@yxwa.info",
    "raw_password": "<INITIAL_PASSWORD>",
    "enabled": true,
    "enable_imap": true,
    "enable_pop": true,
    "quota_bytes": 2000000000
  }' \
  https://mailu.yxwa.info/api/v1/user
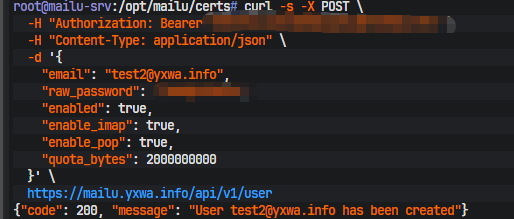
Mailu 的 POST /user 接口要求至少提供 email 和 raw_password。
无交互同步脚本
最终脚本思路很简单:
- 从 AD 指定 OU 查询启用用户
- 读取每个用户的 sAMAccountName
- 拼成 用户名@yxwa.info
- 先调用 GET /user/{email} 检查是否存在
- 不存在则调用 POST /user 创建
- 把日志收敛为只记录创建成功和报错
1. AD 密码文件
注意:密码文件不能带末尾换行,否则 ldapsearch -y 可能会认证失败。
mkdir -p /root/.secrets
printf %s '<AD_BIND_PASSWORD>' > /root/.secrets/ad_bind_password
chmod 600 /root/.secrets/ad_bind_password
2. Python 脚本
保存为 root/ad_to_mailu_sync.py:
#!/usr/bin/env python3
import os
import json
import subprocess
import urllib.request
import urllib.error
import ssl
import sys
from datetime import datetime

# ========= AD 配置 =========
LDAP_URL = "ldaps://DC01.ad.yxwa.info:636"
LDAP_BIND_DN = "administrator@ad.yxwa.info"
LDAP_PASSWORD_FILE = "/root/.secrets/ad_bind_password"
LDAP_BASE_DN = "OU=class,DC=ad,DC=yxwa,DC=info"

# ========= Mailu 配置 =========
MAIL_DOMAIN = "yxwa.info"
MAILU_API_BASE = "https://mailu.yxwa.info/api/v1"

# ========= 环境变量 =========
MAILU_API_TOKEN = os.environ["MAILU_API_TOKEN"]
INITIAL_PASSWORD = os.environ["INITIAL_PASSWORD"]
DRY_RUN = os.environ.get("DRY_RUN", "false").lower() == "true"

# true 时会记录跳过/统计等详细日志
VERBOSE = os.environ.get("VERBOSE", "false").lower() == "true"

# 业务日志文件
LOG_FILE = os.environ.get("LOG_FILE", "/var/log/ad-to-mailu-sync.log")

SSL_CONTEXT = ssl.create_default_context()


def write_log(msg: str, force: bool = False):
    if not force and not VERBOSE:
        return
    now = datetime.now().strftime("%Y-%m-%d %H:%M:%S")
    line = f"[{now}] {msg}\n"
    with open(LOG_FILE, "a", encoding="utf-8") as f:
        f.write(line)


def run_ldapsearch() -> str:
    cmd = [
        "ldapsearch",
        "-LLL",
        "-x",
        "-H", LDAP_URL,
        "-D", LDAP_BIND_DN,
        "-y", LDAP_PASSWORD_FILE,
        "-b", LDAP_BASE_DN,
        "(&(objectClass=user)(objectCategory=person)"
        "(!(userAccountControl:1.2.840.113556.1.4.803:=2)))",
        "sAMAccountName",
    ]

    result = subprocess.run(cmd, capture_output=True, text=True)

    if result.returncode != 0:
        raise RuntimeError(f"ldapsearch 执行失败: {result.stderr.strip()}")

    return result.stdout


def parse_samaccountnames(ldap_output: str):
    users = []
    for line in ldap_output.splitlines():
        line = line.strip()
        if line.lower().startswith("samaccountname:"):
            username = line.split(":", 1)[1].strip()
            if username:
                users.append(username)
    return users


def mailu_request(method: str, path: str, payload=None):
    url = f"{MAILU_API_BASE}{path}"
    data = None
    headers = {
        "Authorization": f"Bearer {MAILU_API_TOKEN}",
    }

    if payload is not None:
        data = json.dumps(payload).encode("utf-8")
        headers["Content-Type"] = "application/json"

    req = urllib.request.Request(url, data=data, headers=headers, method=method)

    try:
        with urllib.request.urlopen(req, context=SSL_CONTEXT, timeout=20) as resp:
            body = resp.read().decode("utf-8")
            return resp.status, body
    except urllib.error.HTTPError as e:
        body = e.read().decode("utf-8", errors="ignore")
        return e.code, body
    except Exception as e:
        return 599, str(e)


def user_exists(email: str) -> bool:
    status, _ = mailu_request("GET", f"/user/{email}")
    return status == 200


def create_user(email: str):
    payload = {
        "email": email,
        "raw_password": INITIAL_PASSWORD,
        "enabled": True,
        "enable_imap": True,
        "enable_pop": True,
        "quota_bytes": 2000000000
    }
    return mailu_request("POST", "/user", payload)


def main():
    try:
        ldap_output = run_ldapsearch()
        usernames = parse_samaccountnames(ldap_output)

        if not usernames:
            write_log("没有查到任何可同步用户。", force=True)
            return 0

        created = 0
        skipped = 0
        failed = 0
        preview = 0

        for username in usernames:
            email = f"{username}@{MAIL_DOMAIN}"

            if user_exists(email):
                skipped += 1
                write_log(f"[跳过] 已存在: {email}")
                continue

            if DRY_RUN:
                preview += 1
                write_log(f"[预览] 将创建: {email}", force=True)
                continue

            status, body = create_user(email)
            if status == 200:
                created += 1
                write_log(f"[创建成功] {email}", force=True)
            else:
                failed += 1
                write_log(f"[创建失败] {email} -> HTTP {status} -> {body}", force=True)

        if VERBOSE:
            if DRY_RUN:
                write_log(f"执行完成(预览模式): 预览 {preview} 个, 跳过 {skipped} 个", force=True)
            else:
                write_log(f"执行完成: 创建 {created} 个, 跳过 {skipped} 个, 失败 {failed} 个", force=True)

        return 0 if failed == 0 else 1

    except Exception as e:
        write_log(f"脚本异常: {e}", force=True)
        return 1


if __name__ == "__main__":
    sys.exit(main())
3. 手工执行
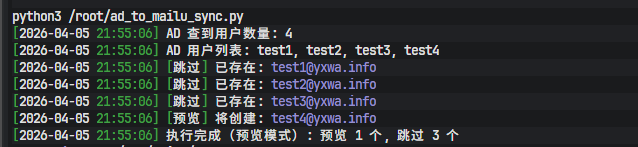
预览模式:
export MAILU_API_TOKEN='<MAILU_API_TOKEN>'
export INITIAL_PASSWORD='<INITIAL_PASSWORD>'
export DRY_RUN='true'
python3 /root/ad_to_mailu_sync.py
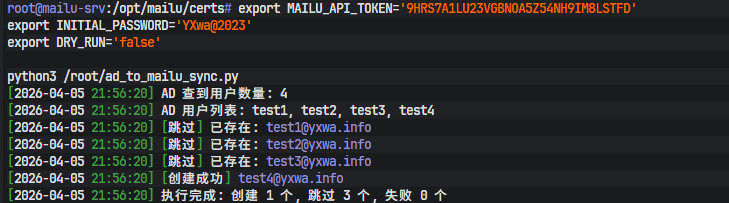
正式模式:
export MAILU_API_TOKEN='<MAILU_API_TOKEN>'
export INITIAL_PASSWORD='<INITIAL_PASSWORD>'
export DRY_RUN='false'
python3 /root/ad_to_mailu_sync.py
实测效果是:已存在用户会跳过,不存在的例如 test3@yxwa.info、test4@yxwa.info 会被成功创建。
做成自动同步
由于需要持续同步,可以挂到 systemd timer。
先创建并赋权日志读取目录文件
touch /var/log/ad-to-mailu-sync.log
chmod 600 /var/log/ad-to-mailu-sync.log
1. service 文件
/etc/systemd/system/ad-to-mailu-sync.service
[Unit]
Description=AD to Mailu sync
After=network-online.target
Wants=network-online.target

[Service]
Type=oneshot
User=root
Environment="MAILU_API_TOKEN=<MAILU_API_TOKEN>"
Environment="INITIAL_PASSWORD=<INITIAL_PASSWORD>"
Environment="DRY_RUN=false"
Environment="VERBOSE=false"
Environment="LOG_FILE=/var/log/ad-to-mailu-sync.log"
ExecStart=/usr/bin/python3 /root/ad_to_mailu_sync.py
StandardOutput=null
StandardError=null
2. timer 文件
/etc/systemd/system/ad-to-mailu-sync.timer
[Unit]
Description=Run AD to Mailu sync every 30 seconds[Timer]
OnBootSec=30s
OnUnitActiveSec=30s
AccuracySec=1s
Unit=ad-to-mailu-sync.service[Install]
WantedBy=timers.target
3. 启动
systemctl daemon-reload
systemctl enable --now ad-to-mailu-sync.timer
如果想更高频,也可以把 OnUnitActiveSec=30s 改成 5s。
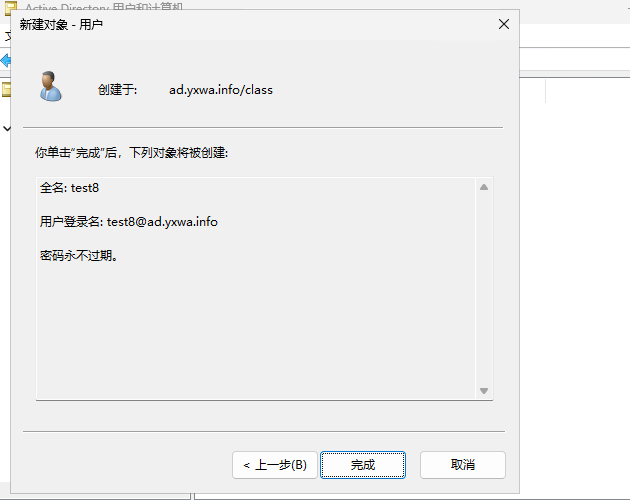
他的实际效果会变成这样

这套方案的关键点其实就三件事:让 Mailu 所在服务器信任 AD 的 LDAPS 证书用 LDAP 从指定 OU 获取启用用户调用 Mailu API 自动创建邮箱
相比直接让 Mailu 原生接管 AD 登录,这种方式更稳,也更容易渐进式落地:先打通同步创建邮箱,再考虑更复杂的统一认证方案。
Comments NOTHING